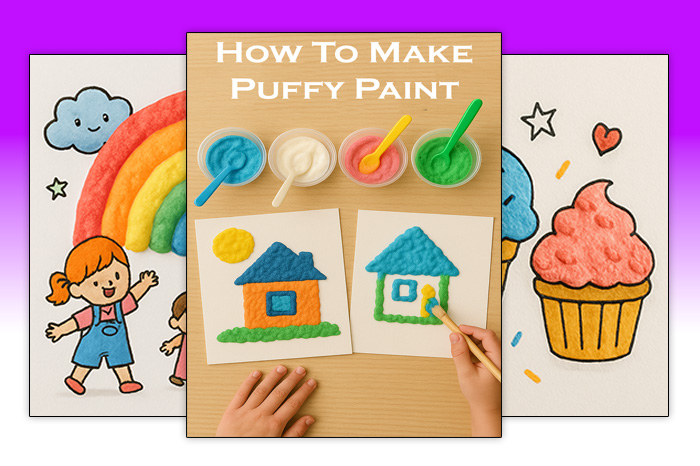
How to Make Puffy Paint at Home
Puffy paint is a fun and fluffy type of DIY puffy paint that kids can use to create amazing 3D artwork! It’s just a mixture of shaving cream and glue, colored with a little food coloring. Then you can create cool 3D textured pictures and other creations.
When puffy paint dries it ends up soft and a bit squishy to touch. It’s such a fun thing to play with, and sparks endless inspiration.
It’s a great family or classroom activity, and adds something special to the classic activity of painting. One great benefit of puffy paint is that it should be a little less messy due to its fluffy texture meaning it drips less than traditional paint. So it’s a good indoor activity on a rainy day!
Kids will learn more about texture and dimensions while painting and having creative fun. Keep reading to find out how, and get your questions answered too!
What Is Puffy Paint?
Puffy paint is a fun and fluffy type of paint that kids can use to create amazing 3D artwork. It’s made using simple household ingredients—usually shaving cream and glue—with a splash of food coloring to bring it to life. Once it dries, the paint stays raised and soft to the touch, giving your child’s creations a textured, puffy finish that’s super satisfying to look at and feel.
It’s a brilliant way to add some extra fun to arts and crafts time. Unlike regular paint, puffy paint has a foamy, marshmallow-like feel that kids love playing with. Whether they’re painting rainbows, cupcakes, or their names, the unique texture adds a whole new layer of excitement to the process—and it’s surprisingly easy to make at home!
What You’ll Need to Make Puffy Paint
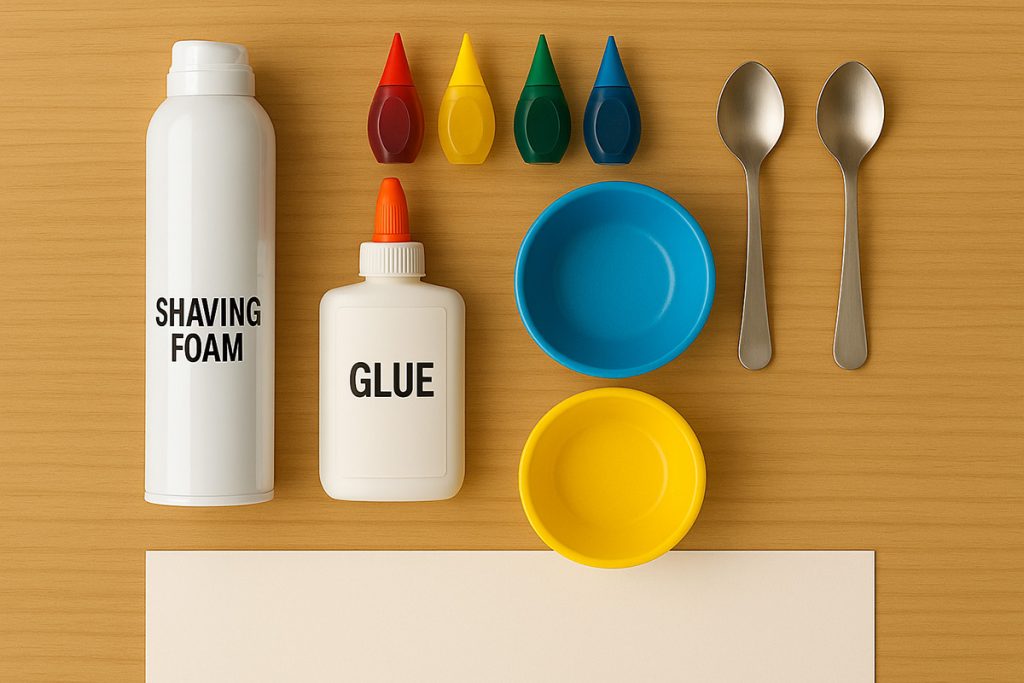
There’s not much you’ll need to make shaving cream paint at home!
Here’s a helpful list of ingredients for this 3-ingredient paint recipe:
- 1 cup shaving cream (foam, not gel)
- 1/2 cup white school glue (like Elmer’s)
- Food coloring (liquid or gel in any colors you like)
Then you’ll need materials to make and paint with it. What you use is up to you, but here’s our recommendations:
- Small bowls (one for each color you’re making)
- Spoons or popsicle sticks for mixing
- Thick paintbrushes or cotton swabs
- Heavy paper like cardstock or cardboard (for painting on)
Once you’ve gathered these items, you’re ready to begin making puffy paint.
It’s an easy kids craft that’s perfect for rainy days or quiet afternoons at home.
Step-by-Step Instructions to Make Puffy Paint
Follow along with my step-by-step instructions below to make your own puffy paint.
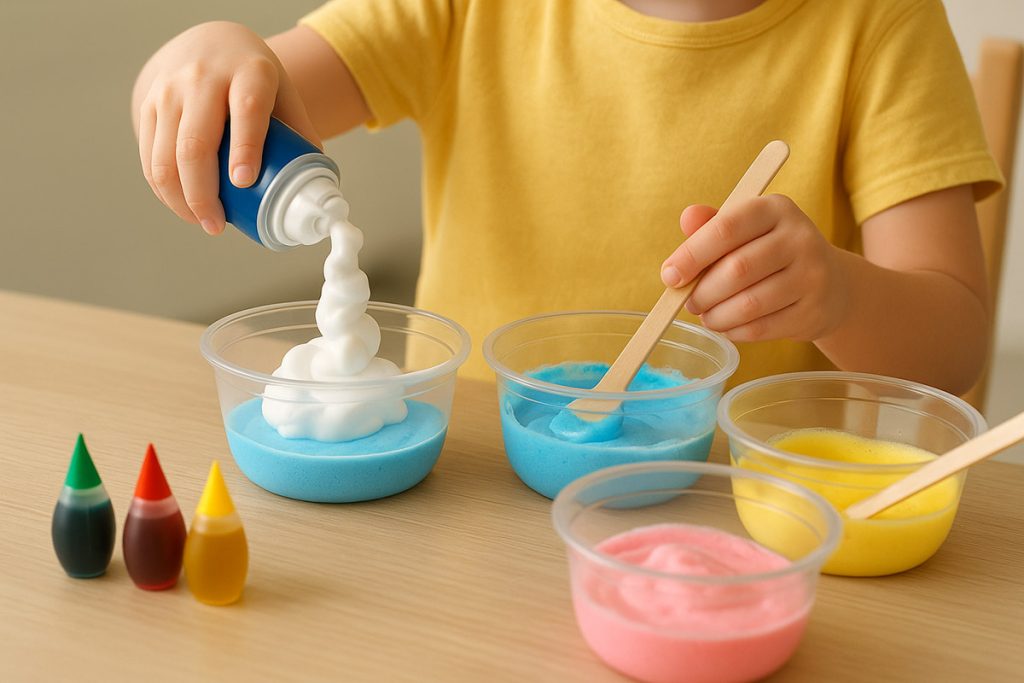
Step 1 – Add shaving cream
Squirt about 1 cup of shaving cream into a small bowl.
Exact measurements are not crucial, as the puffy paint will still work as long as the measurements aren’t wildly off. This means kids can definitely get involved, and it’s no big deal if something goes a little wrong.
Step 2 – Add glue
Next, pour in about 1/2 cup of the white glue you’re using. It helps the paint stay thick and puffy as it dries.
If you don’t want to measure using your kitchen equipment, either have a craft set of measuring cups, or just use any small cup. The ratio matters more than the exact measurements.
Step 3 – Mix gently
Fold in and gently stir the shaving cream and glue together. If you stir too hard it’ll go flat, instead of staying fluffy and foamy.
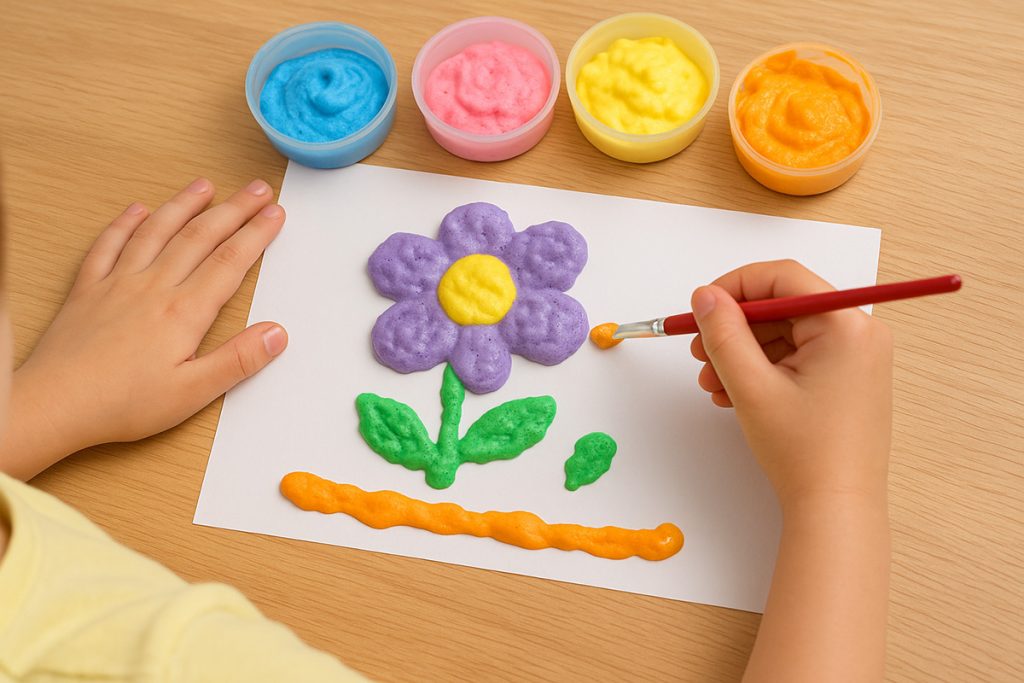
Step 4 – Add color
Split the mixture between a number of small bowls, and then add in a couple drops of food coloring to each. Gently mix each color in, adding a little more if you want it to be brighter. Do be aware however that the puffy paint color will likely darken a little as the paint dries.
Step 5 – Paint!
Now your puffy paint is ready. Use whatever method of painting you have chosen to scoop the paint onto the paper. It’ll be more of a ‘dab’ instead of the normal ‘sweeping’ motion.
Make sure the paper isn’t thin so it won’t wrinkle and warp.
Step 6 – Let it dry
Once you’re done, leave it out flat to dry for at least several hours or overnight. This will make sure the dried paint will stay puffy and raised!
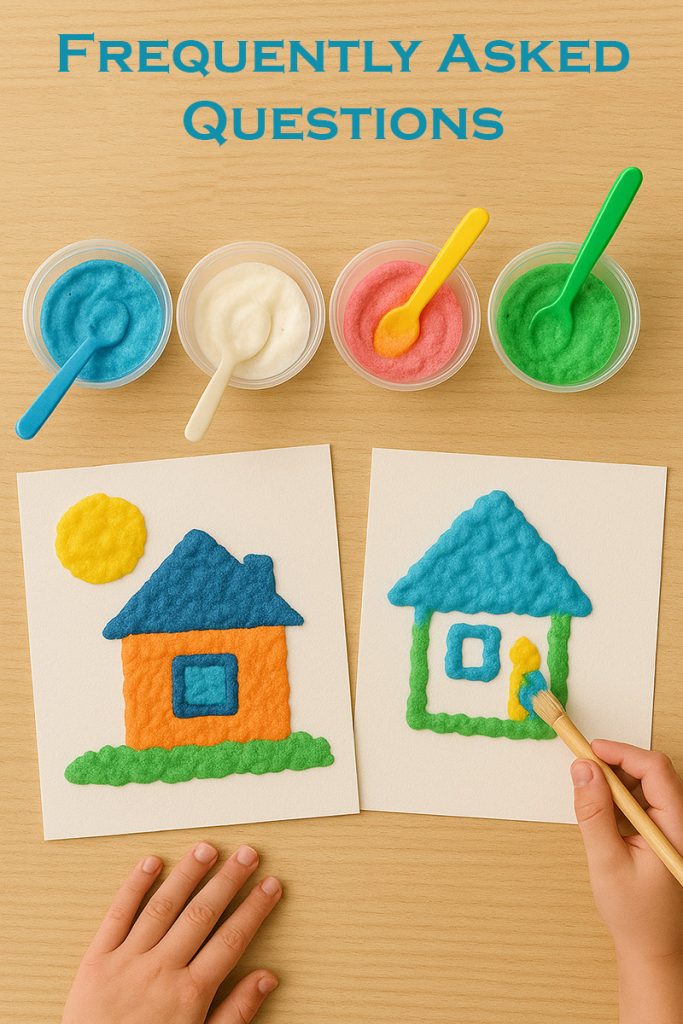
Frequently Asked Questions About Puffy Paint
How long does puffy paint last?
- If you have any leftover, keep it in an air-tight plastic container where it’ll last around 3 days.
Will my puffy painting stay puffy when it dries?
- Yes it will, that’s the beauty of the paint!
- It will likely flatten a little when it dries, so you can apply it a little thicker than you think you’ll need
How should I dry my puffy paint creation?
- When drying your puffy painting, lay it flat and leave it for a few hours to dry all the way through.
- If possible, leave it overnight.
- It can be really fascinating to watch it dry, but try not to touch it or you risk flattening it.
Will puffy paint wash off?
- It should wash out easily from most clothing and surfaces, but it depends on the food coloring you used and how much of it.
- We’d still recommend you use a drop cloth or mat, and wear old clothes or even aprons.
What’s the best way to wash it off of surfaces or out of clothes?
- Use warm, soapy water and scrub at it a little – it should come right off most clothes and surfaces.
Tips, Tricks, and Fun Puffy Paint Ideas
Myself and my daughter really do love puffy paint and find such it such fun. Here’s some tips we’ve loved or have heard about:
- For extra sparkle and fun, try adding a little glitter with your puffy paint! Mix this in when you add the food coloring.
- One way to make fun 3D designs from puffy paint is a squeeze bottle.
- A DIY method for this is – grab a sandwich bag, fill it with puffy paint, then cut off a small corner. Use this as a DIY piping bag!
- Draw lightly in pencil the design you want to create with the paint. This is good for young kids who like more guidance, or older kids who want to give their painting more structure.
- I’d recommend having one paintbrush or popsicle stick for each color of puffy paint.
- If using paintbrushes, make sure to wash them quickly and properly when you’re done. You don’t want the glue in the mixture to ruin them.
Creative Puffy Paint Craft Ideas for Kids
There’s just something about puffy paint that kids really do love. Taking something so normal to them and changing it up just a little can really be so thrilling and turn it into something completely new for them.
It’s such an easy thing to make, using really easily accessible and affordable ingredients, and creates such endless fun with so many different thing you can make.
Here are a few different creative puffy paint ideas:
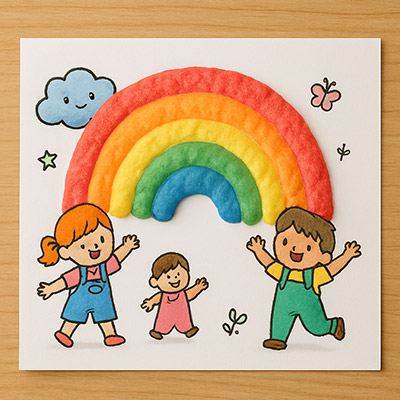
Puffy rainbows
My kids LOVE this one. Make puffy paint in all the colors of the rainbow (this may take a little bit of time so I’d recommend making at least a double batch). Draw out the rainbow lightly, then start adding your puffy paint layers. White puffy paint even works perfectly for fluffy clouds at the base of your rainbow!
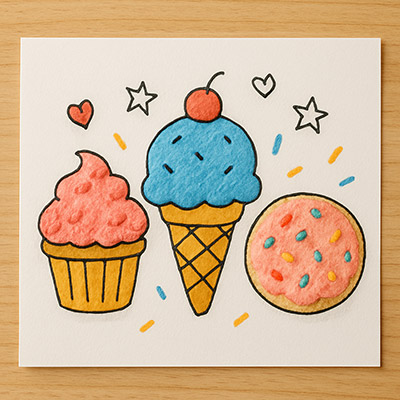
Sweet treats
- Here are a few different ideas for these:
- Cupcakes – ‘icing’ made out of puffy paint always looks so realistic and very cute
- Ice cream cones – make an ice cream cone out of cardboard, glue it onto cardstock and then make the ice cream out of puffy paint! Real sprinkles also work as a cute decoration
- Lillipops – pipe a classic swirled lollipop with puffy paint
- Different fruits can also look really cute too!
Bouquet of balloons or flowers
Again lightly draw what you would like to paint, grab your puffy paint and get started! The balloons are great to start with or for younger kids. And the flowers add a little more complexity but are still easy and look amazing when they’re finished.
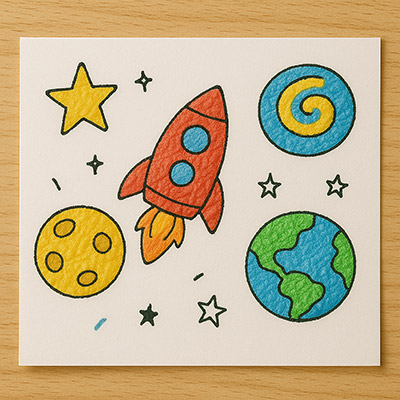
Outer space scene
Grab some black cardstock and create a scene from another galaxy! The puffy paint always looks really striking on a black background, and the 3D effect will only make the scene look cooler.
Names and letters
For young kids who are practising letters and some words, this could be a great method to encourage practice. There’s no better way for a kid to learn through play and fun, so get them to write out some letters or their own name before they can paint whatever they’d like.
Display & Gift Ideas Using Puffy Paint Art
Puffy paint is also a really unique and creative thing to display in your home or to gift.
Hanging decorations
One unique method of displaying your puffy paint creation is to make a hanging display.
Paint something in a specific shape (like a circle or love heart) and let it dry fully. Next, cut out this shape from the paper and stamp a little hole in it. Tie some string through this hole, and you have a hanging wall decoration!
This would be great displayed in your home or your child’s bedroom, but it also works really well if you do themed versions for different times of the year – like pumpkins at halloween or Santa hats at Christmas! Mini versions also work really well as homemade Christmas tree decorations too, for home or gifting purposes.
Easter eggs
You can also paint with puffy paint on things like plastic Easter eggs and get kids to decorate them around Easter time.
Painted rocks
You can even paint on things like a smooth rock. If you find a pretty rock or take one from a beloved beach, then you can decorate it with puffy paint and display this somewhere. Add a representation of a favorite memory and it’s a great keepsake.
Greeting cards
Puffy paint is also fantastic as a decoration for a greeting card. Choose a picture a loved one would appreciate, and do paint it with puffy paint. Let it dry, write a heartfelt message inside, and know that the person you’re giving it to will appreciate the effort you’ve put into it as well as the lovely words it contains.
Conclusion: Why Puffy Paint Is a Must-Try Craft
Puffy paint is such a simple, budget-friendly craft that brings big fun and even bigger creativity. Whether you’re painting rainbows, ice cream cones, or designing one-of-a-kind greeting cards, this DIY puffy paint adds texture and excitement to everyday artwork. It’s a wonderful way to let kids explore color, texture, and 3D art—right from the kitchen table.
Once you’ve had your fun with puffy paint, keep the creativity going with more hands-on printable activities from Mandy’s Printables. Whether you’re crafting, playing, or learning, we’ve got something fun and free for everyone.