How To Make Slime at Home
If you’re looking for a safe, no-mess kids’ activity, then look no further than these DIY slime recipes! Making slime is one of my top ways to spend time with my daughter, especially since she can help with the making process too, unlike some playdough recipes.
I’ve compiled our favourite slime tutorials with simple instructions to help the kids follow along too. It could also be a great independent classroom activity or even an icebreaker between teams.
If you’re new to what slime is or how it works, don’t worry – We’ve got all the information you need to create hours of fun.
What is Slime?
As a parent using social media, slime has been all over my feeds and is sure to take over the household of any kids who are online.
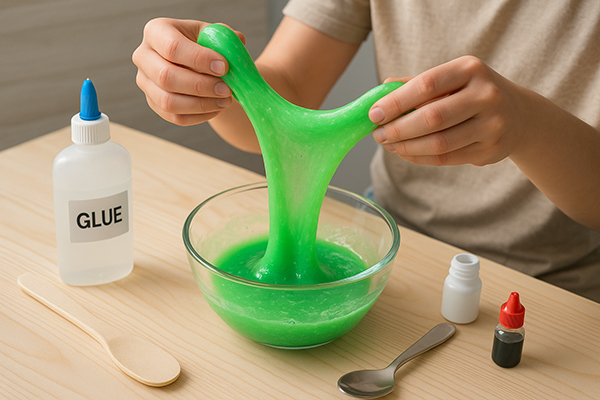
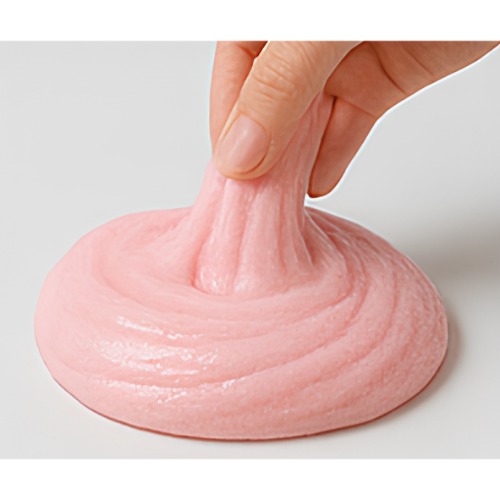
My daughter first discovered slime videos on YouTube and it’s become a great family activity since then, with a wide variety of slimes that can be made. As you might expect, slime is a stretchy goo that you can play with like playdough, or kind of like oobleck.
Homemade slime is not only a fun tool but also great for science experiments or lessons, turning it into a fun STEM learning opportunity alongside an engaging family-friendly activity.
We make all kinds of different slimes at home, including edible slimes that are perfect for younger, tactile children. You can also make crunchy slime for a more tactile and sensory experience, as well as plenty of different colours and styles. If you’re making clear slime, you can put in different colours or textures like glitter. Outside of the extra flair, most slime recipes only use a few simple ingredients that you’re likely to have in your home. I personally keep things cost-effective by bulk-buying things like glue. For a school setting, I imagine teachers have those supplies ready to go!
What You Need: Basic Slime Supplies
Slime is thankfully a pretty basic arts and crafts activity that usually only requires a few household items. You can certainly play around with different items and mixtures, and my daughter and I have certainly made some of our own creations (both good and bad).
That said, most slime recipes use the same few ingredients, so you can keep things exciting and refresh your slime stash without having to spend more. You might also already have tools like measuring cups and spoons to help you measure, though you can always eyeball it and experiment yourself!
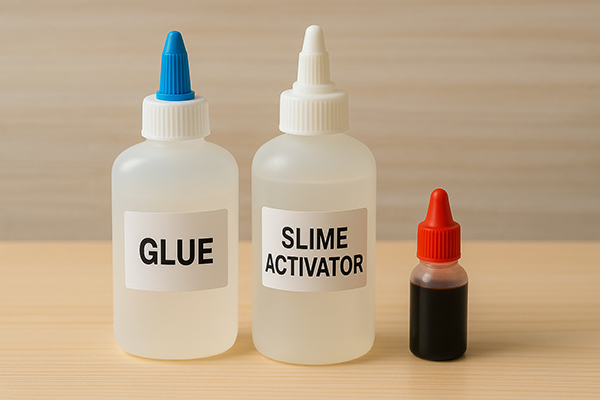
For most basic slime recipes, you’ll need:
White or Clear PVA Glue – This provides the “base” for your slime mix and helps it get that smooth, silky stretchiness!
Slime Activator – Something like borax or liquid starch to help the glue become slime that’s stretchy and not sticky. We’ve even tried making slime with contact lens solution! If using contact solution, you’ll need to add baking soda to help it activate.
Food Colouring – For creating colourful slime, or even rainbow slime!
Optional Design Materials – If you want a mix of textures or some cool designs and patterns, you’ll want items like glitter, foam, beads, and whatever else you’d like to experiment with.
For some of the more unique and advanced slimes, we keep some quirkier items around. While you don’t need to get anything fancy to make slime with the kids, different kinds of textures and patterns can provide a unique sensory and tactile experience as well as teach kids about different combinations. Keep in mind that some items might not be safe for younger kids, so be sure to supervise!
When making textured slime, you’ll need items like:
Instant Snow Powder – Great for a light, fluffy slime like our cloud slime recipe!
Model Clay – Creates a unique texture and pattern, or can be used for different colours.
Glow-in-the-dark Colouring or Paint – Take caution with what you use here and make sure it’s safe for the little ones’ skin. If you’ve got younger kids who may be tempted to stick fingers (or slime) in their mouths, make sure you get items that are safe to be ingested. Alternatively, you can consider an edible slime recipe like the one below.
Essential Oils – Scented slime can add an extra sensory experience to not only the slime-making, but the playing too! Essential oils can also produce different effects, such as lavender for a calming, stress-relieving effect. The bonus is that the house (and the kids!) will smell great after, trust me!
Iron Oxide Powder – We use this for making magnetic slime, which is a super exciting experiment and great for teaching kids about how different chemicals and ingredients react. However, keep in mind that ingredients like this will require careful adult supervision and may be best done as a demonstration for younger children rather than active play. For older kids, this is a great science experiment and learning experience!
Although you can certainly test different ingredients and brands to see how things go, we personally opt for relatively high-quality ingredients, especially when bulk-buying. For the most part, it’s really about finding the right glue so that you get a good, slimy base texture. That said, I’m sure cheaper materials will do the trick so long as they have the right texture – It’s always about trying different things and seeing what happens. It’s okay if things don’t work out, you’ll learn for next time!
Slime Safety Tips
Scrubbing paint out of a carpet, getting playdough out of hair, or scraping crayon off a wall; I’m sure we’ve all been there! Playing with slime is a great clean activity since it doesn’t tend to leave any residue, but things can still happen (especially when stray slime gets lost, or a colouring ends up leaving a mark).
Having experienced plenty of trial and error making slimes and other crafts, I’ve compiled a list of general safety practices as well as personal advice. Remember that, depending on the tools you’re using, not every item is suitable for kids and may need supervision.
If you’re ever unsure, make sure you check the packaging or do some online research. Another important factor is that, for young children especially, slime can pose a choking hazard if they’re left unattended.
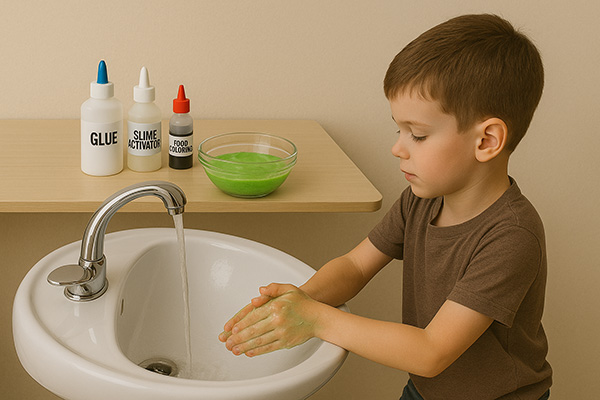
Always wash your hands before and after playing with slime, especially when using colouring. You also don’t want to get dirt in your slime – Part of the charm is the aesthetic!
Although your slime shouldn’t be too sticky, I recommend keeping it away from things like carpets and furniture. When slime dries, it can be a bit tricky to get out of soft materials. Be extra cautious if you have any pets, especially since you don’t want slime stuck in their hair (or yours!).
Wear old clothing or aprons to keep yourself clean and free of slime. Keep in mind that some colouring can stain, depending on what you get, so be careful with clothes and furniture. You might also want to consider placing down a plastic mat on the table, or wherever you’ll be playing with your slime.
Store your slime in airtight containers so that they don’t spoil and dry out.
If using chemical ingredients like borax solution, it’s best if an adult does the mixing so that the kids aren’t handling any irritating materials.
If you do get slime somewhere it shouldn’t be, vinegar is a great solution if it’s started to dry or stick.
I’ve learned from plenty of messes and accidents, but the above tips have been a lifesaver since learning them! The key is to keep slime making and slime play safe, clean, and exciting. It’s a great idea to have a dedicated arts and crafts area or something similar so that any mess is localised to one cleaning spot. For younger kids, this is also a great way to teach certain practices and disciplines. For example, my daughter knows that we only play with slime at the kitchen table, and that playtime ends with proper cleanup and slime storage.
If slimes don’t go back in their airtight containers, we’ll have to make more next time, and keeping different slimes stored means we have a great variety of colours, textures, and even smells available and ready to go. We’ve even taken them to parties or sleepovers on occasion since slime is super popular with kids!
How to Fix Slime
Like any DIY activity, there are always things that can go wrong. As a self-proclaimed slime expert, I’ve learnt a lot about how to avoid common issues, though even we still make mistakes sometimes! Below I’ve listed the most common issues we’ve run into and how we’ve typically solved them, but you can certainly get creative to find what works for you.
Too Sticky Slime
Although it’s made with glue, play slime shouldn’t be sticky! The ideal texture for slime is smooth and silky, meaning it can be stretched, compressed and moulded without sticking to surfaces (or hands!). If your homemade slime is too sticky and clinging to your hands, try the following:
Add some more slime activator, kneading it into the slime a little bit at a time.
If you’re using contact lens solution as your activator, remember that you’ll need to add a pinch of baking soda too!
Don’t worry if nothing happens straight away – Sometimes you may need to just let the slime sit and give the chemical reaction some time.
If the above solutions aren’t helping, I’ve also had success by kneading the slime on a surface dusted with cornflour to dry out the mixture a little more.
Too Runny Slime
Sometimes our slime turns out a little too runny. Ideally, it should sit between a solid and a liquid so that it’s soft and malleable; Perfect for those grabby little hands! If your slime’s consistency is too runny and not holding together, try the following:
Add more glue to thicken up the slime mixture and give it a bit more substance. Remember to add a little bit at a time so you don’t make it too sticky, though you can always adjust later.
If glue isn’t helping or is making the mixture too sticky, add a little bit of activator at a time, remembering to knead in between and give the chemical reactions a moment to get started.
Let it sit overnight since sometimes this helps it firm up. Don’t forget to use an airtight container!
If you’re making something like fluffy slime, adding some extra shaving foam can help up the volume and thickness.
Too Hard Slime
The joy of slime, especially for kids, is that it’s nice and soft and gooey. It’s perfect for squishing about to feel the different textures and see all of the colours, or even to press into moulds and learn about different shapes. Without that delightful gelatinous stretchiness, slime can become too hard to knead around and less enjoyable for kids who can’t poke and stretch it. If your slime feels too stiff or rigid, try the following:
Add a few drops of warm water at a time, kneading in between additions.
If warm water isn’t helping, a squirt of baby oil has done the trick for me by lubricating the slime a little. Alternatively, I’ve heard lotion works!
Add a bit more glue, or clay if using, to try and give it some elasticity.
DIY Slime Recipes
These are some of our favorite slime recipes that my daughter and I have made together. Each one is simple, fun, and comes with a full list of materials and easy-to-follow steps. Whether you’re after something fluffy, sparkly, or a little bit gooey, there’s a recipe here for everyone. Have fun getting creative and maybe even a little messy!
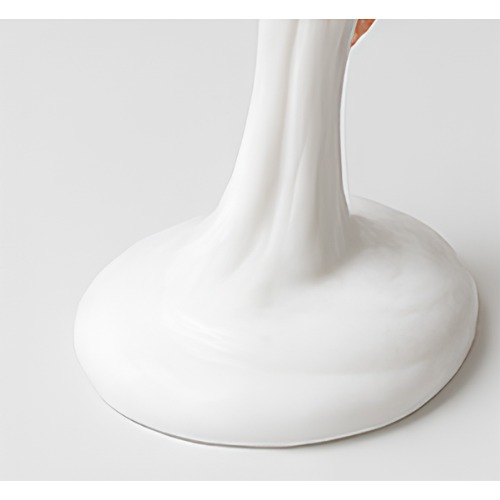
Basic White Slime Recipe
Materials:
½ cup white PVA glue
½ cup water
1 tsp borax mixed into 1 cup warm water (or 1 tbsp contact lens solution + ½ tsp baking soda)
Steps:
1. In a bowl, pour the white glue and mix in the water until it looks smooth.
2. If using baking soda, stir it in now.
3. Slowly add the borax solution or contact lens solution a little at a time while stirring.
4. Keep stirring as the slime starts to clump together.
5. Use your hands to knead it until it’s stretchy and not sticky. Add a few more drops of activator if needed.
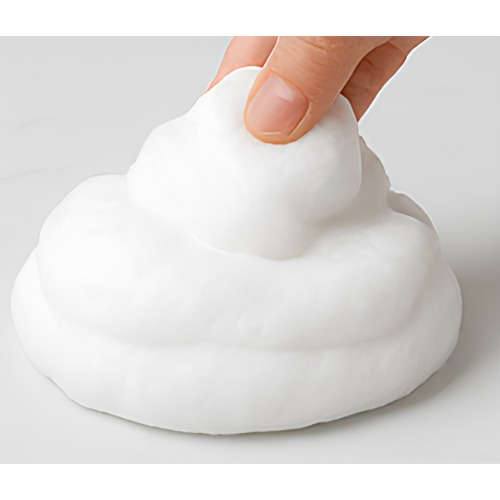
Fluffy Slime Recipe
Materials:
½ cup white glue
2–3 cups shaving cream
1 tbsp contact lens solution
½ tsp baking soda
Food coloring (optional)
Steps:
1. Add white glue to a bowl, then squirt in a generous amount of shaving cream.
2. Stir gently to mix — it will look puffy and foamy.
3. Add baking soda and a few drops of food coloring (if using), and stir again.
4. Slowly add the contact lens solution, mixing until it thickens.
5. When it starts to pull away from the bowl, use your hands to knead it. It should be soft and super fluffy!
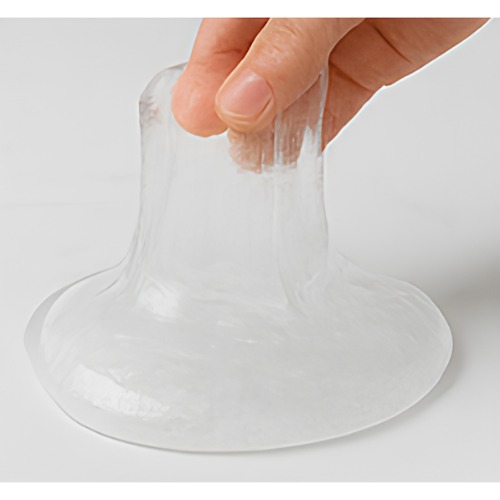
Clear Slime Recipe
Materials:
½ cup clear PVA glue
½ cup water
Borax solution or contact solution + baking soda
Steps:
1. Mix the clear glue and water in a bowl gently to avoid bubbles.
2. Slowly stir in the activator (borax solution or lens solution + baking soda).
3. Stir until the slime starts to come together.
4. Knead gently with your hands. Let it sit in an airtight container for a few days to become extra clear.
Glitter Slime Recipe
Materials:
½ cup glitter glue (or clear glue + loose glitter)
½ cup water
Contact lens solution or borax solution
½ tsp baking soda (if using lens solution)
Steps:
1. Mix the glitter glue and water in a bowl.
2. If you’re using clear glue, add your glitter now and stir well.
3. Add the baking soda (if needed) and stir again.
4. Slowly add the activator while stirring until it begins to firm up.
5. Knead it with your hands until stretchy and sparkly.

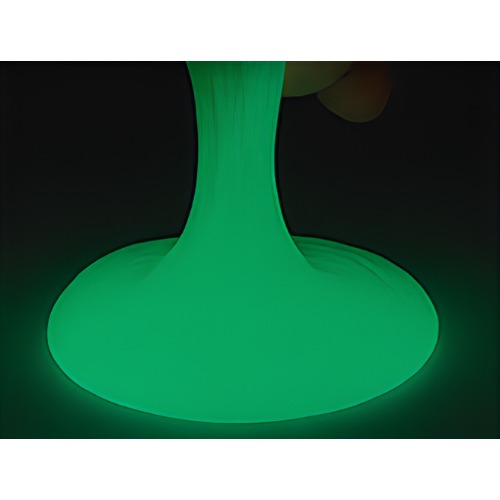
Glow-in-the-Dark Slime Recipe
Materials:
½ cup white or clear glue
A few spoonfuls of glow-in-the-dark paint or pigment
½ cup water
Activator (borax or lens solution + baking soda)
Steps:
1. Combine glue and water in a bowl.
2. Add glow-in-the-dark paint or powder and mix until evenly colored.
3. Stir in baking soda (if needed).
4. Add activator slowly, stirring until the slime pulls away from the bowl.
5. Knead until smooth, then place under a light for a few minutes to “charge” the glow.
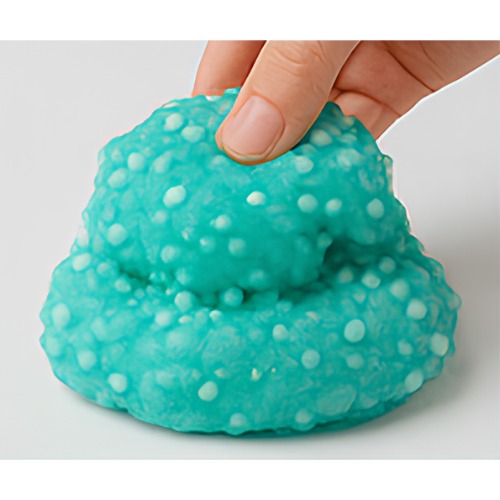
Crunchy Slime Recipe
Materials:
½ cup white or clear glue
½ cup water
Foam beads or plastic beads
Activator (borax or contact solution + baking soda)
Steps:
1. Mix glue and water in a bowl.
2. Add your crunchy materials (foam or plastic beads) and stir.
3. Slowly add activator while mixing.
4. Keep stirring and then knead with your hands.
5. Add more beads if you want extra crunch!
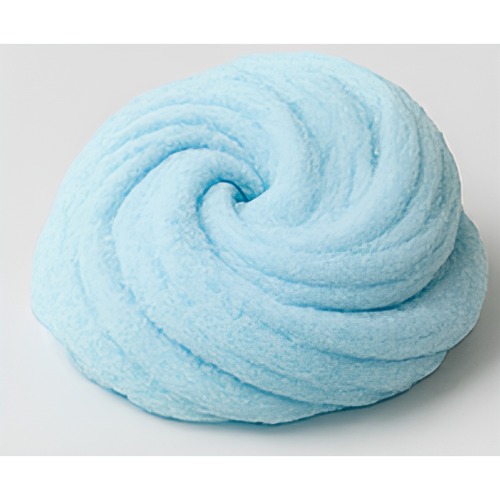
Cloud Slime Recipe
Materials:
½ cup white glue
Instant snow powder
Water
Optional: shaving cream
Activator (contact solution + baking soda)
Steps:
1. First, make basic slime with glue, baking soda, and contact solution.
2. In a separate bowl, mix instant snow powder with water (check instructions on the pack).
3. Let the snow fluff up, then slowly add it into your slime.
4. Knead until the slime has a soft, snowy feel. Add more snow for an extra drizzly texture.
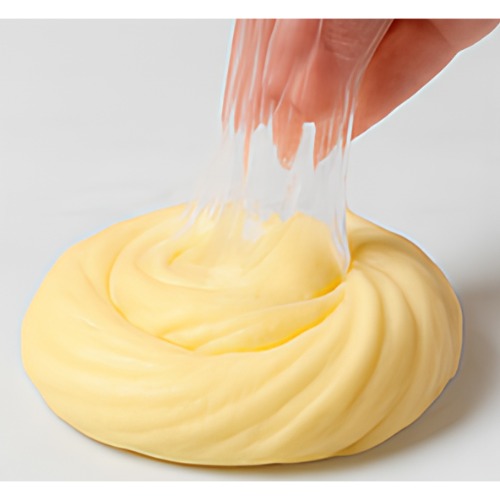
Butter Slime Recipe
Materials:
½ cup white glue
Soft modeling clay (like Daiso or Model Magic)
½ tsp baking soda
Contact lens solution
Steps:
1. Make a base slime with glue, baking soda, and contact solution.
2. Flatten a small piece of clay and press it into the slime.
3. Knead it in with your hands until fully combined.
4. Keep adding clay until it becomes soft, spreadable, and buttery.
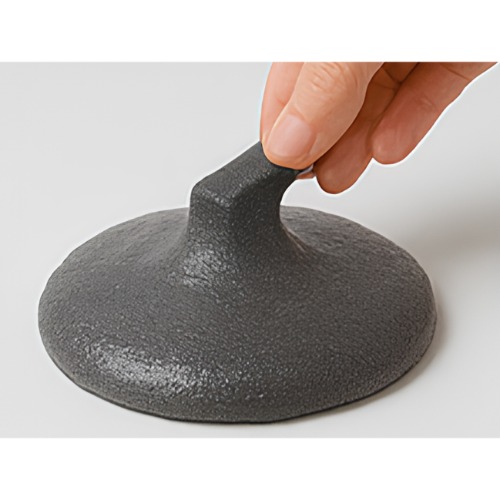
Magnetic Slime Recipe
Materials:
½ cup white glue
Iron oxide powder (1–2 tbsp)
Water (optional)
Contact lens solution + baking soda
A strong magnet
Steps:
1. Mix glue (and a little water, if needed) in a bowl.
2. Carefully add iron oxide powder — wear gloves and avoid inhaling the dust.
3. Stir until the slime turns black or dark gray.
4. Add activator slowly and stir.
5. Knead until stretchy. Use a strong magnet to watch it move!
Scented Slime Recipe
Materials:
½ cup white glue
½ cup water
A few drops of fragrance oil or kid-safe essential oil
Activator (borax solution or contact lens solution + baking soda)
Steps:
1. Mix glue and water in a bowl.
2. Add a few drops of your chosen scent and stir gently.
3. Stir in baking soda if needed.
4. Slowly add the activator, stirring constantly.
5. Knead until smooth and enjoy the smell!
Fun Crafts for Kids
If you enjoyed making your own slime, you might love these fun and simple crafts too! One of our favourites is the Lion Loo Roll Craft — just grab a toilet roll tube, some coloured paper, and googly eyes to create your own king of the jungle. It’s a great way to turn recycling into roaring fun!
Another hit is our Pear Ice Lolly Stick Craft. With a few lolly sticks, green paper, and a splash of creativity, kids can make an adorable pear character complete with a smile and leafy top. These cheerful crafts are perfect for a fun afternoon or a fruity themed activity!